Crispy Perfection: The Ultimate Guide to Air Frying Frozen Breadsticks in Just 4 Minutes
Searching for the quickest and easiest way to prepare a delicious side dish or snack? Look no further! This comprehensive guide will show you how to transform frozen breadsticks into golden, crispy perfection using your air fryer – all in an astonishingly short four minutes! Forget soggy microwave breadsticks or waiting for your oven to preheat. The air fryer delivers incredible results, making it the preferred method for many home cooks. Just like our popular Air Fryer Texas Toast, these frozen breadsticks follow a remarkably similar, straightforward process for both cooking time and temperature, ensuring a hassle-free experience.

These air-fried frozen breadsticks are not just fast; they’re incredibly versatile. They serve as an ideal accompaniment to a wide array of meals. Imagine pairing them with a hearty Italian classic like Air Fryer Pepperoni Pizza Pasta or a comforting Lasagna. They’re also fantastic alongside soups, salads, chili, or even as a standalone snack. Their crispy exterior and soft, warm interior make them an instant family favorite, elevating any meal with minimal effort.
Why Choose the Air Fryer for Frozen Breadsticks?
The air fryer has revolutionized how we cook many frozen foods, and breadsticks are no exception. Here’s why it’s the superior choice for cooking frozen breadsticks:
- Unmatched Speed: As you’ll discover, air frying frozen breadsticks takes just 4 minutes. This is significantly faster than a conventional oven, which requires preheating and longer cook times, and even quicker than many microwaves that can leave breadsticks soft and chewy instead of crispy.
- Perfect Texture Every Time: The circulating hot air in an air fryer ensures that breadsticks cook evenly and develop a beautifully crispy crust while remaining tender and fluffy on the inside. You get that satisfying crunch without any deep-frying oil.
- Even Cooking: The convection heating ensures no cold spots or unevenly cooked sections, a common issue with microwaves. Each breadstick gets uniformly heated and crisped.
- Energy Efficient: Air fryers generally use less energy than large ovens, making them a more economical choice for smaller batches of food.
- Minimal Cleanup: Most air fryer baskets are non-stick and easy to clean, making post-meal tidying a breeze. Less mess means more time to enjoy your meal.
Selecting the Best Frozen Breadsticks for Air Frying
While almost any brand of frozen breadsticks will work wonderfully in your air fryer, some brands offer a slight edge in taste and texture. Our personal preference tends to be New York Bakery Breadsticks. They consistently deliver a superior flavor and a delightful texture that stands out among store-bought options. When choosing your frozen breadsticks, consider these tips to ensure the best possible air-fried result:
- Garlic vs. Plain: Garlic breadsticks are a classic choice and usually come pre-seasoned, adding an extra layer of flavor without extra steps. They are often brushed with garlic butter, which crisps up beautifully in the air fryer. Plain breadsticks offer more versatility for custom seasoning if you prefer to add your own herbs and spices.
- Cheese-filled Options: Some brands offer cheesy breadsticks, which melt beautifully in the air fryer, creating a gooey, irresistible treat. The cheese adds an extra layer of richness and a satisfying pull.
- Size Matters: Standard-sized breadsticks generally fit well in most air fryer baskets. If you have larger breadsticks or a smaller air fryer, you may need to adjust the quantity per batch to ensure proper air circulation and avoid overcrowding.
- Crust Preference: Look for breadsticks that promise a good crust. The air fryer excels at making things crispy, but a good starting product helps!
Considering Homemade Breadsticks or Cheesy Garlic Bread?
While the convenience of frozen breadsticks is undeniable, sometimes you might crave the fresh, wholesome taste of homemade. If you’re in the mood to whip up some cheesy bread or delicious homemade breadsticks from scratch, your air fryer can still be your best friend! It’s fantastic for baking smaller portions of dough, offering a crisp crust and tender interior similar to a conventional oven, but with faster preheating and cook times. Check out these fantastic recipes for Air Fryer Cheesy Bread and Air Fryer Garlic Knots. These homemade alternatives offer a different kind of satisfaction and allow for even more customization of flavors and ingredients, though they will naturally require more prep time than simply popping frozen ones into your air fryer.
The Absolute Best Way to Prepare Frozen Breadsticks in Your Air Fryer: A Step-by-Step Guide
Getting perfectly cooked frozen breadsticks in your air fryer is incredibly simple. Follow these steps for golden, crispy results every time. Remember, the goal is to warm them through and achieve a delightful crispness without drying them out.

1. Prepare Your Air Fryer Basket
Before placing the breadsticks, we recommend coating your air fryer basket with a light spray of grapeseed oil or another high-smoke-point cooking oil spray. This step is crucial for two reasons: it helps prevent the breadsticks from sticking to the basket, and it contributes significantly to that desirable crispy, golden exterior. A light, even coating is all you need to achieve excellent results.
2. Arrange the Breadsticks Evenly
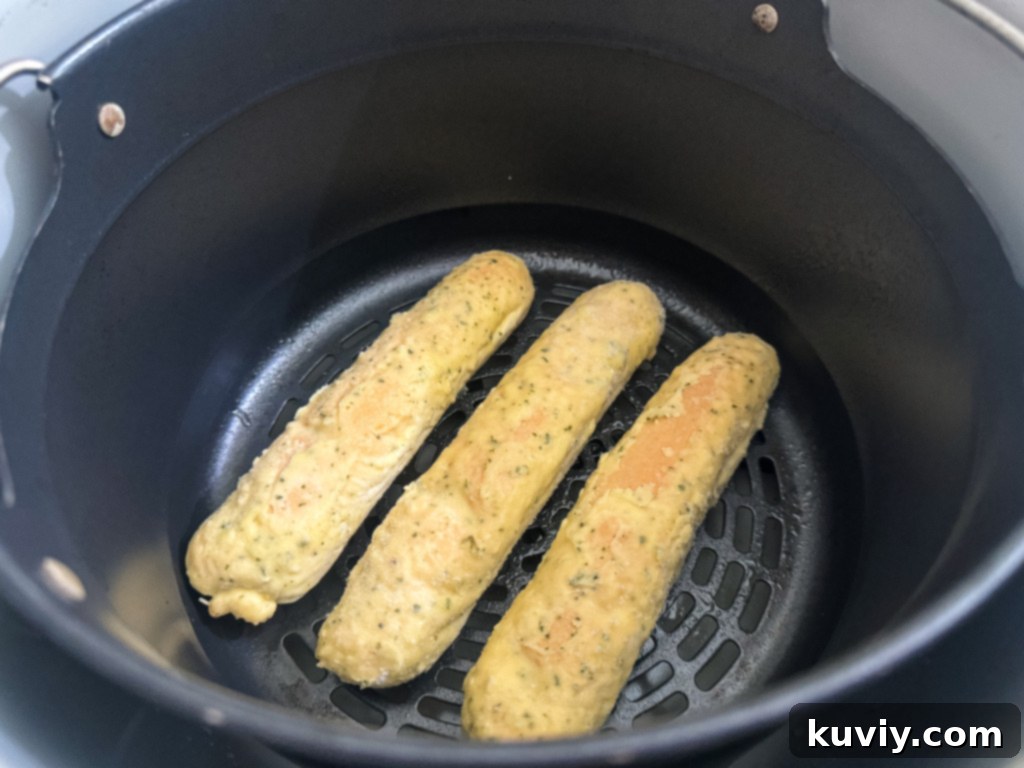
Carefully place your frozen breadsticks into the air fryer basket. The key to achieving optimal crispiness and even cooking is to ensure there’s adequate room around each breadstick for the hot air to circulate freely. Avoid overcrowding the basket or layering the breadsticks on top of each other, as this can lead to uneven cooking and soft spots. Depending on the size and shape of your air fryer, you might need to cook them in batches. For instance, in our Ninja Air Fryer, we typically find that heating up 3 breadsticks at a time yields the best results for perfectly golden and crispy outcomes.

3. Air Fry to Perfection
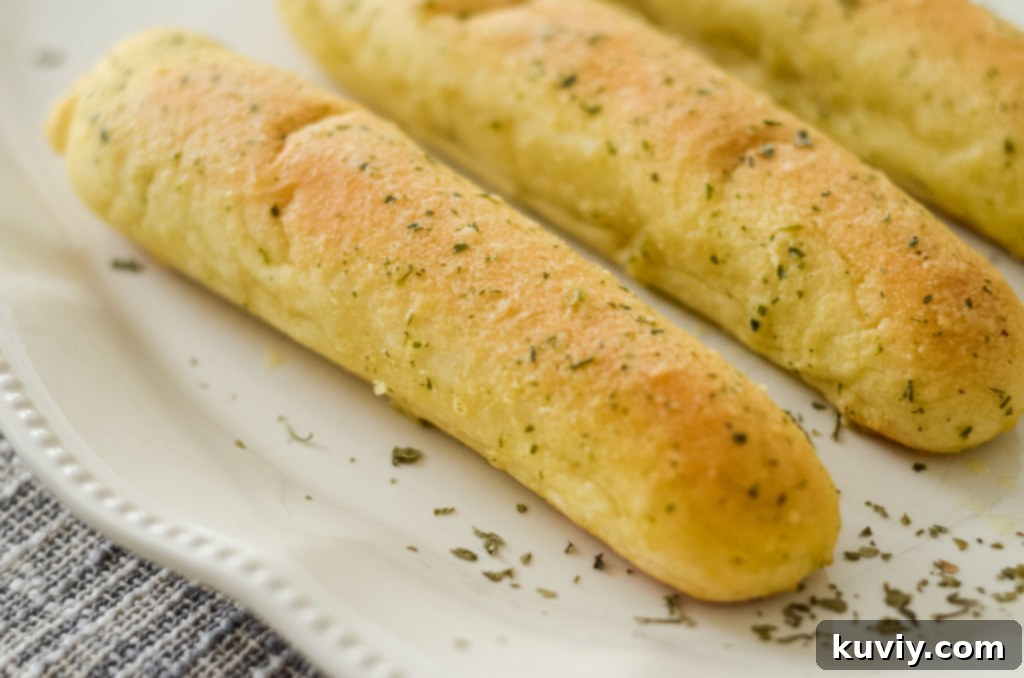
Once your breadsticks are arranged, you’re ready to cook! Place the basket into a **cold air fryer** – there’s no need for preheating, which saves you even more valuable time. This method ensures the breadsticks heat through and crisp up gradually. Air fry the breadsticks at 390 degrees F (approximately 199 degrees C) for just 4 minutes, or until they are soft and warm on the inside, and beautifully golden and crispy on the outside. Remember that air fryers can vary slightly in heating power and efficiency. After the initial batch, your air fryer basket will be warm from residual heat, which might slightly reduce the cooking time for subsequent batches. For these later batches, you may want to check on them around the 3-minute mark to prevent any overcooking and ensure they’re just right.
4. Optional: Enhance the Flavor
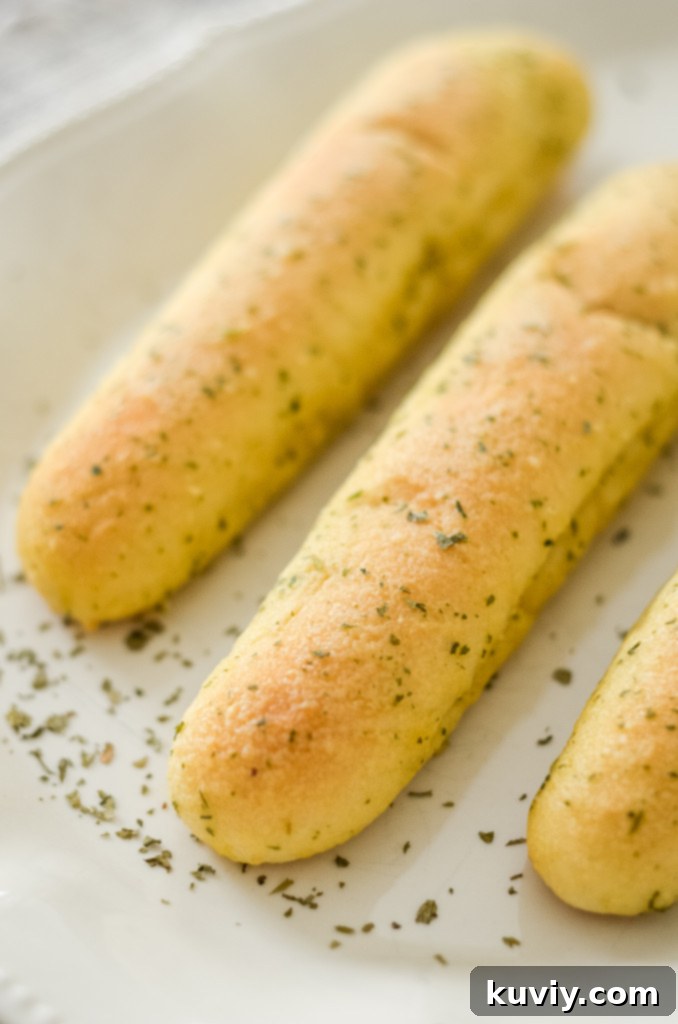
For an extra boost of flavor and a touch of homemade appeal, consider sprinkling your cooked breadsticks with additional seasonings just as they come out of the air fryer. A dash of Italian seasoning, garlic powder, dried parsley, red pepper flakes, or a generous sprinkle of freshly grated Parmesan cheese can make a significant difference. You can also brush them lightly with melted garlic butter (made with butter, minced garlic, and parsley) for an even richer, more indulgent taste. These small touches can transform a simple frozen side into something truly special and customized to your preferences.
Delicious Dipping Sauces for Your Air Fryer Breadsticks
Once your perfectly air-fried breadsticks are ready, they’re simply begging for a delicious dipping sauce. While they’re fantastic on their own, a good sauce can elevate the experience and perfectly complement your meal. Here are some of our favorite dipping sauce recommendations to make your breadstick experience even more enjoyable:

- Classic Ranch Dressing: The creamy, tangy, and herby flavor of ranch is a surprisingly delightful pairing with warm, garlicky breadsticks, offering a refreshing contrast.
- Rich Marinara Sauce: A natural and undisputed partner, especially if your breadsticks are accompanying an Italian meal like spaghetti, meatballs, or lasagna. A good quality jarred marinara, or a homemade version, works wonders.
- Melted Garlic Butter: For an ultimate garlic breadstick experience, melt some unsalted butter, mix in a pinch of garlic powder (or fresh minced garlic), and dried parsley, then serve it as a dipping sauce. It’s an irresistible, flavorful addition.
- Warm Cheese Sauce: A simple cheddar, mozzarella, or a blend of cheese sauces adds a comforting, savory, and gooey touch, perfect for dipping. A quick homemade béchamel with cheese would be ideal.
- Pesto: For a fresh, herbaceous, and slightly nutty option, a vibrant basil pesto offers a unique and flavorful dip that pairs beautifully with the bread’s texture.
- Olive Oil & Balsamic Vinegar: A sophisticated and traditional choice, especially if you have good quality extra virgin olive oil and a rich, aged balsamic for dipping. Add a pinch of black pepper or herbs to the oil for extra flavor.
- Alfredo Sauce: A creamy Alfredo sauce can add a rich, decadent touch, turning your breadsticks into a more substantial appetizer.
Often, we find ourselves simply dipping our breadsticks directly into the sauce of whatever meal we’re enjoying, such as the rich marinara from spaghetti or the creamy goodness of a lasagna. This practical approach not only adds flavor but also minimizes extra dishes, making cleanup even easier!
Storage and Reheating Air-Fried Breadsticks
While these air-fried breadsticks are undoubtedly best enjoyed fresh and hot from the air fryer, it’s certainly possible to store and reheat any leftovers. This makes them a great option for meal prep, a quick addition to another meal, or simply having a convenient snack on hand.
Storing Leftovers
To keep your leftover breadsticks fresh and prevent them from becoming stale or dry, allow them to cool completely to room temperature first. Once cooled, place them in an airtight container or a resealable plastic bag. Store them in the refrigerator, where they will remain delicious for up to 4 days. Proper storage helps maintain their texture and prevents them from drying out or absorbing unwanted odors.
Reheating for Freshness
When you’re ready to enjoy them again, reheating is a breeze, and you have a couple of options:
- Microwave Method: For the quickest reheat, you can microwave a breadstick for about 30 seconds. Be aware that while this warms them quickly, the microwave tends to make them softer and chewier rather than restoring their initial crispiness.
- Air Fryer Method (Recommended for Best Results): For the best results, and to regain that wonderful crispy texture you loved the first time, reheat them in the air fryer. Place the cooled breadsticks back into the air fryer basket in a single layer. Cook at 330°F (approximately 165°C) for 1-2 minutes. Keep a close eye on them, as they will reheat very quickly. This method brings them back to near-fresh perfection, with a perfectly warmed interior and a delightful crunch that rivals their initial cook.

Cooking frozen foods like these breadsticks in the air fryer is truly a culinary game-changer. The sheer ease of heating them up in just minutes, combined with the superior texture you achieve compared to a microwave or conventional oven, makes it an undeniable winner for busy households. I might be biased, but the air fryer just does it better when it comes to frozen breadsticks!
Tips for Air Frying Success with Breadsticks
Achieving consistently perfect air-fried breadsticks is simple when you follow a few key tips:
- Don’t Overcrowd the Basket: This is arguably the most important rule of air frying. Leaving ample space between breadsticks allows the hot air to circulate freely around each piece, ensuring even cooking, browning, and maximum crispiness. Overcrowding leads to steaming rather than frying, resulting in soggy breadsticks.
- Always Use Oil Spray: A light mist of a high-smoke-point cooking oil spray (like grapeseed, avocado, or even a light olive oil spray) is crucial. It helps achieve that desirable golden-brown crust, enhances flavor, and prevents the breadsticks from sticking to the air fryer basket, making cleanup easier.
- Monitor Initial Cook Time: Air fryers vary significantly in their wattage and heating elements. The first time you make these, start checking for doneness around the 3-minute mark. You might need to adjust the cooking time by 30 seconds to a minute, either more or less, to perfectly match your specific air fryer model and achieve your preferred level of crispiness.
- Consider Flipping Halfway: While not strictly necessary for such a short cook time, especially if your air fryer circulates air very efficiently, flipping the breadsticks halfway through (at the 2-minute mark) can sometimes promote even browning and crisping on all sides, particularly if your air fryer tends to have slight hot spots.
- Experiment with Custom Seasoning: Don’t hesitate to get creative with flavor! Before or after cooking, a sprinkle of garlic salt, onion powder, a pinch of red pepper flakes for a kick, dried herbs like oregano or thyme, or even everything bagel seasoning can add a unique and delicious twist to your breadsticks.
Frequently Asked Questions About Air Frying Frozen Breadsticks
Here are some common questions we get about air frying frozen breadsticks, along with our expert answers:
Q: Do I need to thaw frozen breadsticks before air frying?
A: No, absolutely not! One of the biggest advantages and conveniences of this method is that you can cook them directly from frozen. This saves you valuable time, eliminates a prep step, and makes the process incredibly quick and convenient. In fact, cooking from frozen often yields a better texture.
Q: Can I put aluminum foil in the air fryer?
A: Yes, you can generally use aluminum foil in an air fryer, as long as it’s used safely. Ensure it’s placed carefully and weighed down by the food so it doesn’t fly around during cooking and obstruct the heating element or fan. However, for breadsticks, it’s often best to place them directly in the basket to maximize crispiness, as foil can sometimes prevent direct contact with the circulating hot air needed for a golden crust.
Q: What temperature is best for air frying frozen breadsticks?
A: We’ve found that 390°F (199°C) is the ideal temperature for frozen breadsticks. This temperature is hot enough to crisp the exterior quickly and effectively without drying out the inside, achieving perfect results in just 4 minutes.
Q: My air fryer has a “reheat” function. Can I use that?
A: While the reheat function might warm them up, we generally recommend using the manual air fry setting at 390°F for 4 minutes to achieve the best crispy texture for initially cooking frozen breadsticks. Reheat functions can sometimes use a lower temperature or a different heating cycle that might not give the desired level of crispness and browning.
Q: Can I air fry other frozen bakery items using this method?
A: Yes, this air frying method is highly adaptable! Many similar frozen bakery items like garlic knots, frozen Texas toast, frozen waffles, or even small frozen croissants can be cooked in the air fryer with similar temperatures and slightly adjusted times. Always keep a close eye on them, especially during the first batch, as cooking times can vary based on the item’s thickness and ingredients.

Air Fryer Frozen Breadsticks Recipe
Recipe by Air Fryer Fanatics
Pin Recipe
Save Recipe
Saved!
1 minute
4 minutes
5 minutes
Air Fryer Side Dishes
American
6
+
66
kcal
Ingredients
- Frozen Breadsticks (your preferred brand)
- Cooking Oil Spray (such as grapeseed, avocado, or olive oil)
- Optional: Italian Seasoning, Garlic Powder, or Grated Parmesan for topping
Instructions
-
Lightly coat the air fryer basket with your chosen cooking oil spray (e.g., grapeseed, avocado). This prevents sticking and promotes crispiness.
-
Arrange the frozen breadsticks in a single layer in the air fryer basket, ensuring there’s space between each one for optimal air circulation. Do not layer them.
-
Place the basket into a cold (not preheated) air fryer. Cook at 390°F (199°C) for 4 minutes, or until they are golden brown, crispy on the outside, and soft on the inside.
-
For even crispier results, you may optionally flip the breadsticks halfway through the cooking time (at the 2-minute mark).
-
Serve immediately with your favorite dipping sauces. Enjoy!
Notes
Nutrition
Serving:
1
Breadstick
Calories:
66
kcal
Carbohydrates:
5
g
Protein:
1
g
Fat:
4
g
Saturated Fat:
1
g
Polyunsaturated Fat:
3
g
Sodium:
71
mg
Tried this recipe?
Mention @AirFryerFanaticsRecipes and Tag #AirFryerFanatics!

Final Thoughts: Your New Go-To Side Dish
Preparing frozen breadsticks in the air fryer is a culinary revelation. It’s a method that perfectly blends speed, simplicity, and sensational results, making it an indispensable technique for any home cook. Whether you’re a seasoned air fryer enthusiast or a newcomer to the world of rapid cooking, this recipe promises to deliver warm, garlicky, and irresistibly crispy breadsticks every single time. Say goodbye to waiting around for the oven to preheat or dealing with inconsistent, often soggy, microwave results. The air fryer consistently ensures a beautiful golden-brown exterior and a perfectly tender interior, making these breadsticks the ideal companion for almost any meal – from elaborate Italian feasts to simple, casual weeknight dinners. With just minutes of active cooking, you can impress your family and friends with a side dish that tastes incredibly fresh and homemade. So, next time you’re looking for a quick, delicious, and satisfying side, grab your favorite brand of frozen breadsticks, fire up your air fryer, and get ready to enjoy the easiest, most delicious breadsticks you’ve ever made!
